Have you ever heard of the Orton effect?
Even if you answered no, it’s very likely that you’ve seen a photo with the Orton effect on it – you just didn’t know what it was. It’s actually a very popular technique, especially in landscape photography.
The Orton effect can instantly transform an image from ordinary to atmospheric – if you use it in the right way.
That’s why Luminar Neo has a dedicated feature to easily apply the Orton effect, while still giving you the tools to stay in control of the final result.
Whether you’re new to photo editing or already familiar with Luminar Neo, this tutorial will walk you through the process step by step.
You’ll also learn when to use the effect, when to avoid it, and how to get professional-looking results with it.
By the end of this article, you won’t just know how to apply the Orton effect, but how to make it work for your style and photos.
What Is the Orton Effect?

The Orton effect is the most common name for a photographic technique named after Michael Orton, who developed it in the 1980s. As you can imagine, this was from a time before digital photography, so it started as an analog process.
Michael Orton is a Canadian photographer who began his career experimenting with various techniques to achieve a painterly, impressionistic look in his images. His goal was to “reach beyond the parameters of documentation,” as he says in his artist statement.
For this effect, he captured two versions of the same scene on slide film. One of the images needed to be perfectly sharp, while the other one was intentionally blurred. He then overlaid both shots, which is why the technique is often called a ‘slide sandwich.’
The result was a soft-focus image with a soft glow, giving his images a dreamy, almost magical quality. This signature look is now known as the Orton effect.
His work was first published in the book Once Upon an Island and later featured in well-known photography magazines.
Over time, the technique gained popularity, with a major surge in the early 2000s as digital editing made it easier to replicate.
What Type of Photos Look Best With The Orton Effect?
Landscape photography is by far the most popular use for the Orton effect. This is partly because it was the original application by Michael Orton – as you can see in his online gallery.
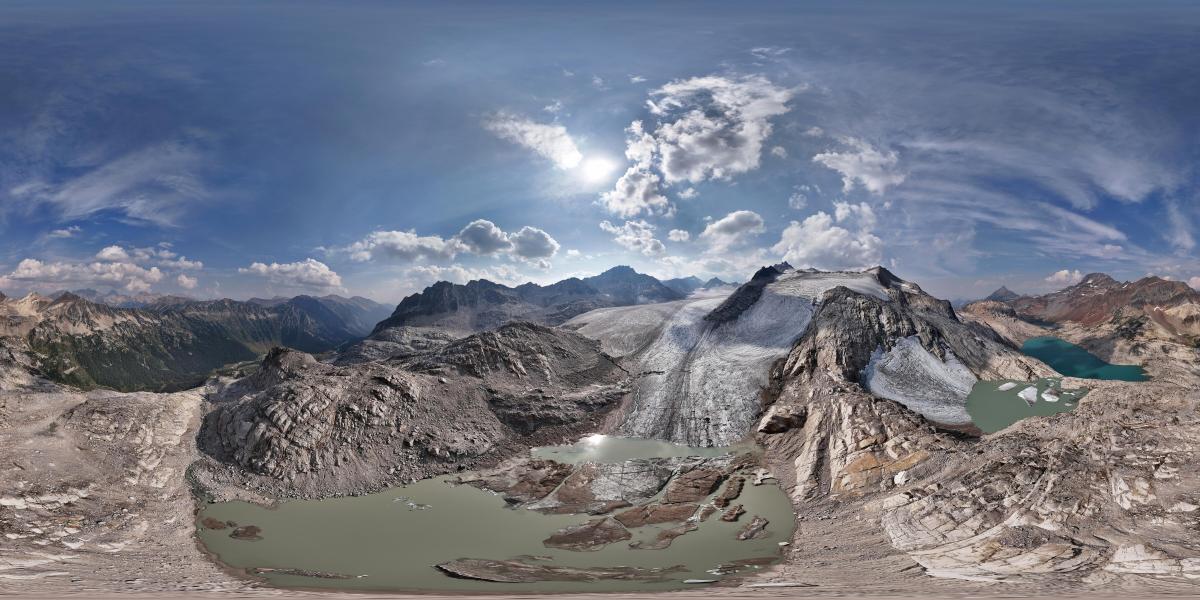
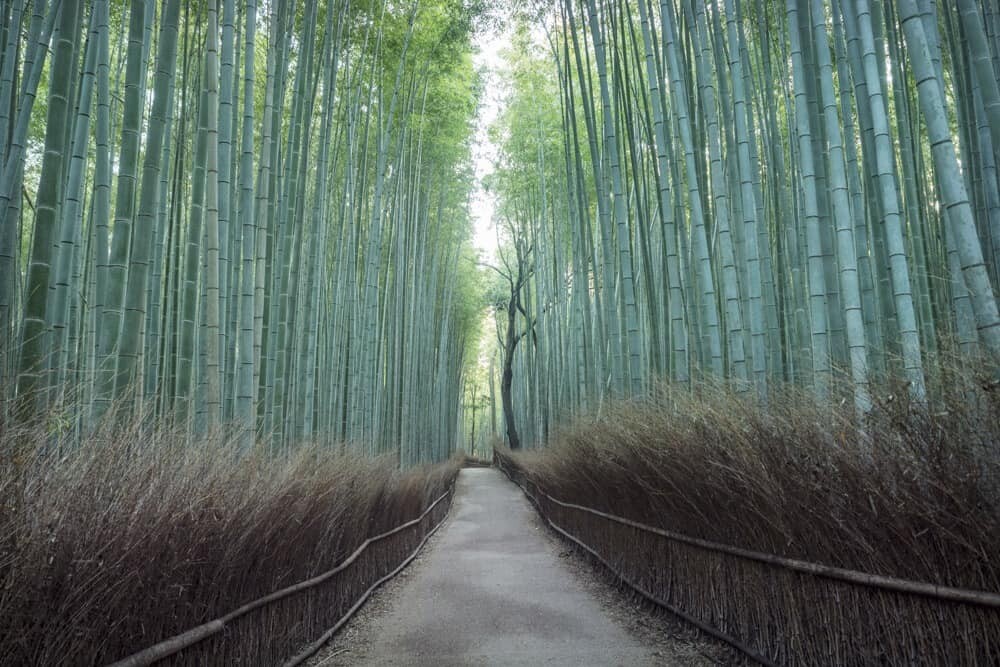
However, it’s also because most articles and tutorials online focus on landscape photography. In fact, the effect works especially well with forests, mountains, waterfalls, and foggy scenes.
This is because the glow enhances light rays, softens textures, and creates atmosphere. It turns an already beautiful scene into something more emotional and immersive.
That said, I encourage you to experiment with the Orton effect in other photographic genres. Keep in mind that Orton’s original intent was to create a painterly look, which is why it also works well for fine art compositions.

Try adding the Orton effect to a still-life scene. It can transform everyday objects into something unique and worthy of being displayed on your wall.
You can also use it with people to add a soft, dreamy quality to a portrait.
A great approach is to start with a high-key image and apply the effect subtly. Perhaps you want to mask the eyes or the face to retain sharpness and detail in those areas.

Fantasy portraits can also benefit from the Orton effect, since it enhances the storytelling feel. In the end, the best results come from intention and conscious use of the technique.
The Orton effect isn’t tied to a genre. It’s more about creating atmosphere and supporting the mood you want to achieve in your photographs.
How to Achieve The Orton Effect in Luminar Neo: Step-by-Step Guide
Step 1 – Import your photo
Start by opening Luminar Neo and importing your photo into the catalog. You can simply drag and drop your file, or use the Add Photos button.
If you’re new to Luminar, this step is straightforward and protects your original file. Once in there, you can manage your photos using folders and collections, taking advantage of the smart search tool and other tools.
Step 2 – Go to the Orton Effect tool
Once your photo is in the Catalog, make sure it’s selected and click on the Edit tab at the top of the screen. This will open the file in the editing section of Luminar Neo.

Here, navigate the right-hand panel until you reach the Creative section and find the Glow feature, not to be confused with the Neon and Glow tool.
Click on Glow to open its tool panel.
The first thing you’ll find in the Glow tool is the ‘Type’ drop-down menu. Open it and choose whether you want Orton Effect or Orton Effect Soft.
I suggest you try both. This will help you understand how each one behaves and which better fits your style and the scene you’re working on.
In simple terms, the Orton Effect Soft is a more subtle version of the standard Orton Effect. In practice, I’ve noticed that the Orton Effect Soft tends to reduce contrast more, resulting in a more diffuse glow and a smoother look.
Step 3 – Adjust the sliders
Once you’ve chosen the type, you can regulate the intensity using the slider underneath the menu.
Move it from left to right to see how it increases. Please consider that until you increase the Intensity, the effect won’t be visible at all.
While going all the way to the right is good for understanding the effect and seeing what it does, especially the first few times you use it, I recommend choosing lower numbers to get better results.
Going over the top almost never benefits the final look of your image.

Next, click on the Advanced Settings to access the other sliders. Here, you can control the Softness, Brightness, Contrast, and Warmth.
There isn’t a magic formula that works every time. My recommendation is to move the sliders until you find a balance that you like. Fortunately, every adjustment you make is immediately visible on the image. So, just keep an eye on it and stop when you like how it looks.
I usually lower the brightness because the Orton Effect easily blows out the highlights. Other than that, I go with whatever looks best on the specific image I’m working on.
Sometimes, I don’t need to make any further adjustments and leave the sliders alone.
Step 4 – Use masking for better control
This step is optional, as you might prefer applying the Orton effect evenly across the entire image.
However, masking gives you more control and allows you to create a stronger sense of depth.

Like any tool in Luminar Neo, you’ll have a Masking tab for local adjustments.
You can use AI tools to easily select the subject or more intricate areas, or you can choose a brush, linear gradient or gradient mask depending on your needs.
For example, you might add the Orton effect to achieve some glow on the background while leaving the subject untouched. This is especially important on portraits where preserving details in the eyes and face helps you achieve a natural look.
In this example, I’m applying the Orton effect in the background to add a mystical look, while reducing it in the foreground elements to keep texture and details. This creates depth and separation, achieving a more powerful result.
Step 5 – Fine-tune the Orton effect using other editing tools
While having a dedicated feature makes Luminar Neo a great option to apply the Orton Effect, it doesn’t mean that you have to stop there.
Neo is packed full of editing tools – traditional and AI-powered – to help you achieve a unique look that will help take your photographs to the next level.
The first thing you might want to do is to fine-tune the light and color. You can do this with the traditional Develop module or by using something specific like Mood, Color Harmony, etc.

Then, you may want to experiment with some other creative tools like Magic Light or Mystical. All these complement the Orton Effect nicely. However, make sure you don’t over-edit your photo as this can be counterproductive.
Remember that Luminar Neo is a non-destructive editor. This means that you can always adjust or remove edits you’ve already applied. All you need to do is click on the Edit tab on the top-right corner and find the edit you want to modify.
You can also click on the back arrow to reset it, or the trash can to remove it.
Step 6 – Export, share, or publish your final image
As I mentioned in the first step, all edits made in Luminar Neo are applied to the photo you imported, not to the original file saved on your hard drive.
So, to use your final image outside of Luminar Neo, you have to export it using the Export tool. Here, you can choose the destination folder, file format, size, and quality.
Alternatively, you can share your image directly from within Luminar Neo by choosing AirDrop, Messages, or Mail if you want to share it with someone in particular. It’s also possible to publish it to an online gallery using the Luminar Space option.
Why Use Luminar Neo for the Orton Effect?
One of the biggest advantages of using Luminar Neo is how easy it makes it to apply the Orton effect. Instead of recreating the technique manually, you get two dedicated options: Orton Effect and Orton Effect Soft.
This means you can achieve the look in seconds. However, these ready-to-use solutions also put you in control, with intuitive sliders and built-in masking tools to decide exactly how the effect is applied.
At the same time, Luminar Neo supports layers, giving you the option to manually achieve the Orton effect when you want full control.
Finally, Luminar Neo is a full-featured photo editor, not just a one-click tool.
This means you can combine the Orton effect with color grading, light adjustments, detail enhancement, and AI-powered tools to shape the final image with professional-quality results.
Orton Effect: Tips and Tricks
- Experiment. Try different settings and approaches; that’s the best way to learn and improve.
- Keep an eye on the highlights. The glow from the Orton Effect can easily blow out the highlights – be careful.
- Choose the right photo. Not every photo benefits from the Orton Effect, so choose wisely.
- Don’t overdo it. Remember that with the Ortone Effect, less is more.
- Compare before and after often. Toggle the effect on and off to always keep perspective.
- Use masking to achieve depth and contrast. Apply the effect selectively for best results. For example, apply it only to the background.
- Use other tools to fine-tune the effect. Don’t limit yourself to the adjustments inside the Orton Effect to perfect the look; make use of the full array of tools available in Luminar Neo.
FAQs
Can you achieve the Orton effect in-camera?
Yes, you can use the double exposure feature on your digital camera to mimic the Orton effect. Remember to use a tripod so the framing remains the same.
Then, take one picture with everything sharp and one where you defocus the lens and increase the exposure a bit – the camera will do the rest. However, unlike creating the effect in Luminar Neo, you won’t have full control over the final result.
When should you not use the Orton effect?
The Orton effect can be beautiful, but it’s not meant to be used on every photo you take. If you need your image to look realistic or if it doesn’t match the mood, don’t use the effect. Also avoid it when you need to preserve sharp details or when the highlights are already strong.
Is the Orton effect still popular?
Like any trend, the Orton effect comes and goes in popularity. Currently, it’s not something that’s overflowing on Instagram or anything like that. However, when used subtly, especially with intention, it’s always a good choice.
Do I need a raw file to make the Orton effect?
No, you can apply the Orton effect to JPEG files as well. Do keep in mind that a raw file gives you more leeway to adjust highlights without losing detail.
Do I need two photos to make the Orton effect?
If you want to create the Orton effect, as Michael Orton originally invented it, yes. The analog effect is created by combining two slides. However, you don’t need two images if you’re doing it digitally.
Can I make an Orton effect Preset in Luminar Neo?
Of course, you can make an Orton effect Preset in Luminar Neo. Use a sample image and follow the instructions above to create an Orton effect. Then, go to the Presets tab and open the three-dotted menu at the bottom. Here, choose Save as Preset and name it Orton Effect – now it’s ready to use on any picture you want.